

Using the Silver Reed EC1/PE1 for Pattern Control
- PurlaGoose
- Mar 31, 2019
- 9 min read
Updated: Sep 4, 2022
What is the Silver Reed EC1 Pattern Controller?
The Silver Reed EC1 Pattern Controller will automate the needle selection on the Silver Reed 830, 840, 860 and 890 Knitting Machines.
The EC1 works based on a pattern drawn on a Mylar (see video below). It can also be controlled using digital input from a PE1 device (explained later).
How do I use the EC1?
We finally had to tape the instructions onto the device. They are in the manual, but having to pull out the manual just to knit is a bit disappointing and we’d almost rather not knit. Here are the summary instructions:
Turn on EC1
Press the inspection switch (light goes on)
Insert Mylar Sheet, lined up to pattern row 1
Set pattern width with the two dials
Set point cams on the needle bed
Memorize point cams with your carriage
Set up the pattern switches (reverse, mirror, stretch and squish etc)
Press the inspection switch (light goes off) . the first row of the pattern will now be read
Note: If you’re having trouble with your EC1, we highly recommend that you test using the pre-printed mylar to eliminate any possibility that the issue is with the mylar. Also, be sure that you’ve plugged your carriage into the curl cord. I always carry a spare curl cord to eliminate the possibility of the wires in the curl cord being damaged inside, where you can’t see it.
What is a Mylar?
Technically, “Mylar” is brand name of a plastic material made by DuPont. However, in the context of machine knitting, a mylar is a plastic “paper” used to either define a needle selection pattern or for garment shaping with a Knit Contour (a totally different post!). So, for this post, imagine the mylar as being a paper that defines the needle selection for the knitting machine. The colored in blocks either mean to select a needle or don’t select the needle (depending on the settings on the EC1 device).

3 Mylar Fun Facts
Mylars are reusable – That’s why we use a pencil! Yes, you can erase and reuse a mylar, until it can no longer be erased!
You can put more than one pattern on a mylar – Maybe you don’t even need to or want to erase a previous pattern. You don’t have to! Just find a “blank” area on the mylar. Most stitch patterns do not use the entire 60 stitch width or all of the rows on a mylar. Feel free to add another pattern in another area. When you run out of blank mylars, then you can erase the previous patterns and try again.
You can take notes on mylars! Because you define the number of stitches and rows in a stitch pattern, you can write notes “outside” of the stitch area (see photo above)
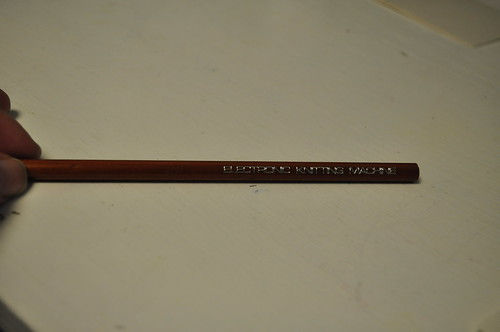
What’s the Best Pencil for Drawing on Mylars?
We use the Staedtler Mars Technico Lead holder and 2mm 2H leads. We use 2mm leads because we’re lazy and 2mm will fit most of the mylar square in one swipe! Our tired wings need a break! You can buy these leads in multiple hardnesses (or should we say “softnesses”?)
The pencil comes with 2H and it works. However, next time we buy lead refills, we’re getting HB. We asked the clerk at the store for a “#2” pencil. She sent us home with a 2H, but we really should have gotten HB. Goes to show, listen to goose instincts! (reference: Pencil Hardness Scale)

The eraser that really works to erase the pencil from the mylars is the battery powered Helix eraser. Always use white erasers. Test them before investing in many refills. We find that the pink erasers hold more graphite, thus causing smudge. White erasers don’t hold as much graphite and therefore they smudge less.
Admittedly, the eraser is a fun item but it works well – particularly if you’re trying to erase just one square or even an entire mylar. It’s got a very small tip for the precision, but because it’s battery operated, it erases large areas well too without smudging or spreading graphite all over the place.
You may be asking “But what about the official Silver Reed Design Pencil”?
The original “Silver Reed Design Pencil” was originally included with the machine so that you could use it with the EC-1 mylars. Frankly, we find this strange since the machine had NO mylars and the EC-1 was a separate purchase. Ok,strange, but true. So when we got our EC-1, the dealer threw in the Design Pencil. Great! We were sure “Design Pencil” must be better than “regular pencil”.
After testing, we decided that “Design Pencil” is just a #2 pencil. A mechanical pencil is easier because it doesn’t need constant sharpening (which could become necessary with a wood pencil, due to the area that needs to be colored in).

What Does the PE-1 Do?
The PE-1 is an add on unit to the EC-1 that adds memory and “computer like” control. Here are some things a PE-1 can do:
Create stitch patterns with repeats wider than 60 stitches
Use DAK (Design a Knit) software to design stitches and “download” the stitch pattern to the PE-1 without having to use a mylar at all! (this requires a SilverLink 3 – which will be mentioned later)
Ability to save stitches from a Mylar (or DAK) to a card
The primary disadvantage to PE-1 is that you must have it connected to the EC-1 and EC-1 must be turned on. We got our PE-1 and didn’t realize that it has no power cord. PE-1 connects to EC-1, which does have its own power cord. The EC-1 feeds the PE-1 power through the 8pin DIN umbilical cord. Unfortunately, that means that it has limited ability to remember anything.
Can’t remember the key sequences for PE-1? Hate pulling out the manual? We created the cheat card for our PE-1 for the common functions (Read, Load, Knit, Save). We think this avoids pulling the manual out 90% of the time.
The PE-1 Backup Battery
So, what do you do if you’re mid pattern and “Oh no!”, you have to pause and go to sleep or do something else? Well, if you have that built in battery all charged up, it should remember where you were in the pattern. According to the manual, you just need to charge the battery for a full 8 hrs by leaving EC-1 on (not just plugged in but really turned on with the fan whirring!). We geese left the EC-1 on but we’re not sure that the battery really charged. We turned off the system and it didn’t remember anything.
Is this surprising? No, not considering that our poor PE-1 was sitting lonely in a stock room for at least 7 years, without any love or exercise! Remember that technology from as early as 7 years ago was batteries with lots of memory issues and the batteries didn’t hold a charge very well unless used regularly. Clearly, our PE-1, having sat, lonely didn’t get used and now can’t hold a charge.
Need “memory”? Not a problem – just replace the $3 battery in the memory card. You can save and recall patterns from the memory card. When you want to pause and turn off EC-1, just hit the = button, take note of the row number, then shut down. Then when you go to knit again, no problem, recall the pattern, set up to knit (don’t forget to memorize point cams!), then hit the + button to get to the row that you noted earlier. Now you’re ready to go again. We think that this process is far easier and faster than setting up the mylar, particularly when we’re working multiple projects and swapping patterns a lot.
Excellent article about the backup battery with a photo! http://chrysalis-creations.blogspot.com/2011/02/pe-1-backup-battery.html
How do you Organize your EC-1/PE-1?

View as we glance above our Knitting Machine

Side view of the stand itself
We’re not sure what Silver Reed was exactly thinking when they designed EC-1/PE-1. I mean the devices really don’t really have a natural “spot” on your knitting table. PE-1 sits very low on the table. You’re not going to put it on either side of the machine. I mean, you want to sort of watch the pattern move on the screen, particularly for lace where it’ll tell you when to switch from transfer to transfer and knit. If you put it behind the machine, it sort of gets hidden. This is why we wanted it to “stand up” rather than lay down. A bit of scrap lumber and 20 mins and we had a little stand.
Part list:
Bottom = .75″ x 3.5″ x 10″
Back = 6″x10″
Front Rail = .5″x1.5″x10″ (a 2″ rail instead of 1.5″ rail might have been nicer, we lost lots of height because of the depth of the bottom)
Side rails = .5″x1.5″x5″ (cut two)
Screws, tools and sand paper.
We screwed ours together, you probably could glue and nail it, if you wanted to.
SilverLink3 for PE-1
When we started to use EC-1/PE-1, we loved electronic pattern control, but hated having to draw the patterns on the mylar. Even worse, we didn’t want to have to use so much brain power to translate lace transfers for our lace carriage. We love using the computer to do these things, even the BAD, inconvenient DAK interface (ok, we don’t like DAK but it’s better than a pencil!).
So, when Carson was doing some research, he found SilverLink 3. There were several varieties of SilverLink 3:
SilverLink 3 9 pin serial: Pattern upload/download via 9 pin serial port
SilverLink 3 USB:- Pattern upload/download only via USB
SilverLink 3 USB + : allows knit from screen AND pattern download/upload
Ideally, we would have gotten SilverLink 3 USB+, but we couldn’t find one! So we picked up the only SilverLink 3 9pin that we could find. The dealer and DAK website will warn you about the nasty effects of using a serial to USB cord that isn’t theirs. These dealers want (COUGH) $56 for a Serial to USB converter! Admittedly, eons ago, when these converters first came out, Wilbur got us one for our Brother Embroidery PES system and it was $50. But today, you need not pay that much!!! We will admit that if you try it and it doesn’t work, you’re out of luck. No support and your converter is a loss (unless you think you can return it). Below is the one that we got and it works with our Windows 7 laptop (probably would work with Win 10 but we sold it before we could test it). We didn’t get it to work well with our virtual machine 😒 but that could be because we didn’t know the com port number.
So here’s what we did:
Get the USB to Serial Converter, SilverLink 3, DAK. Load DAK on the laptop (we’re using Win 7 Pro 32 bit)
Plug the red end of SilverLink 3 into the EC-1 (or PE-1 port of a SK580), plug the blue end to PE-1, plug the serial port into the USB to Serial converter.
Load the driver for the USB to Serial Converter, then plug in the USB converter to your computer. PAY ATTENTION! When Windows 7 recognizes the cable, it should tell you which COM port it connected it to. WRITE THIS DOWN!
Open DAK.
Open the Stitch Design to download.
Click on Transfer, Download. The first time, you’ll need to highlight Silver Reed/PE-1 and click the Setup Button. Then type in the com port number from step 3. DAK cannot sense this like SilverLink 5! You must know this number! Click OK on the Setup screen then Ok on the Knitting Equipment Selection screen.image
You’ll then see a screen like this. Once you’ve done the actions indicated on PE-1, this screen disappears and switches to a progressometer.
You’ll want to save the pattern because you’ll need to turn off your machine (or EC-1)
turn off your EC-1 now.
Change from the SilverLink3 to the original PE-1 cord that came with PE-1.
Turn on your machine/EC-1 and recall the pattern and then knit = as normal.
To upload from PE-1, you follow the same steps, except using the Upload option instead of download. When you upload, you’ll need to tell DAK how many rows/stitches there are.
Here are some of the funny problems with this link:
When we downloaded from DAK, it downloaded in mirror image! EEK! So if you want it to download to PE-1 the same way as it looks on the screen, use the option Modify, Flip Vertical, Save, then download. The funny thing is, we didn’t notice this mirror flipping when we uploaded from the PE-1 but maybe we didn’t watch carefully? Will have to try again. When we downloaded a lace pattern that was created using the Lace Add On Tool, it did not download properly and didn’t download the instructions to knit and transfer or transfer only.
But never fear, if you want to use EC-1 with lace patterns then you have three options:
Buy punch card patterns, enter them into DAK as a fair isle pattern and then keep your own notes on whether to knit and transfer/ transfer only (or only use this method for simple lace where all moves are knit and transfer)
Buy punch card patterns, create a mylar with the dots and enter the instructions for knit and transfer/transfer only into columns 1-4, read the mylar into PE-1. (note: if you upload this pattern, you’ll probably lose the instructions since DAK won’t know what to do with them). This is what we’d do if we had the punch card pattern. Why translate them into the hand knit symbols?
Design the pattern using DAK and the Lace Add-on tool, then click on File, Print Stitch Patterns, select the file you want to print and type in ST in the “Selected formats” column. This will print the “punch card pattern”. Enter this info on a mylar. DAK will tell you the instructions for knit and transfer/ transfer only. This is the method we’d use for a hand knit pattern or one that we designed ourselves because this will save us time since DAK will translate the transfers for us. Smile
We have NOT tested Double Bed Jacquard patterns with 3 or 4 colors so we’re not sure how well that will work, but supposedly DAK will split these for us and send that to PE-1 properly with the splits and colors.
Overall, we’re quite thrilled with our $110 investment and wish we had done it originally!


Comments